

今回は、AR Foundationの平面検出機能を使い、タップした平面に箱を配置するということをしていきたいと思います!
学習に使った本はこちら!
 クマじい
クマじいAmazon Kindle Unlimited でもUnityの本はいっぱいあるんじゃ!!
前回の「ARで箱を表示してみよう!」の続きになりますので、まだ見ていない方はぜひ見てください!!
平面を検出する
AR Plane Managerの配置
AR Plane Manegerが、今回の主役となる平面検出を担ってくれる機能です。
これをAR Session Originに追加することで、平面検出を可能にしてくれます。
まずは、前回の画面を表示してください!
前回作成した「AR Session Origin」を編集していきます!
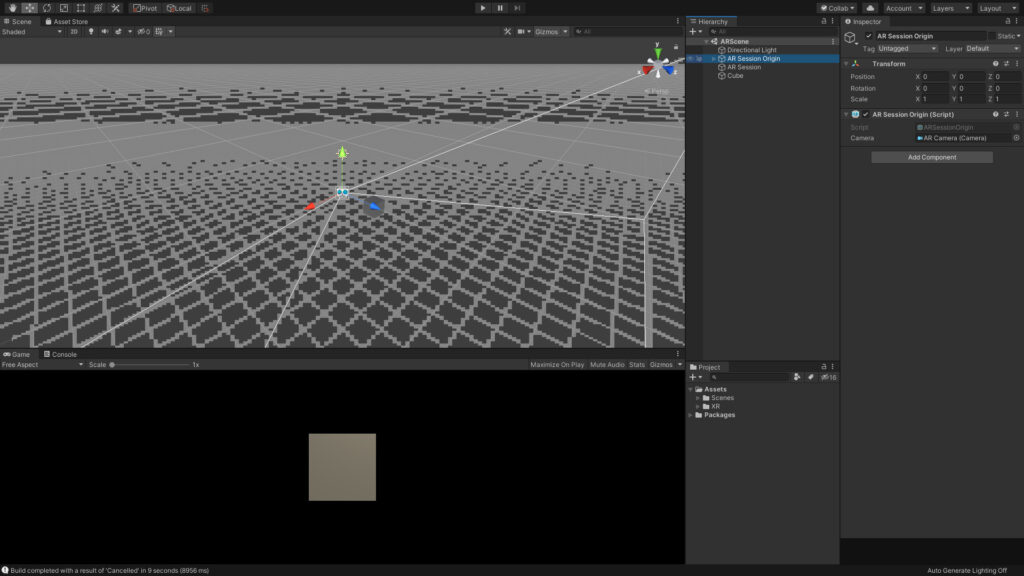
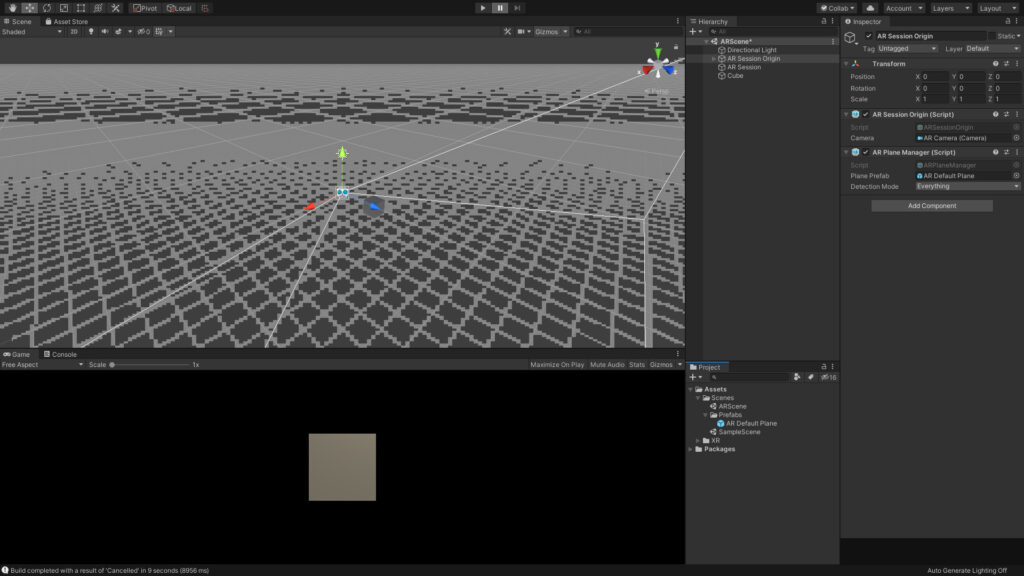
「AR Session Origin」を選択し、Add Component>AR Plane Managerを追加します!
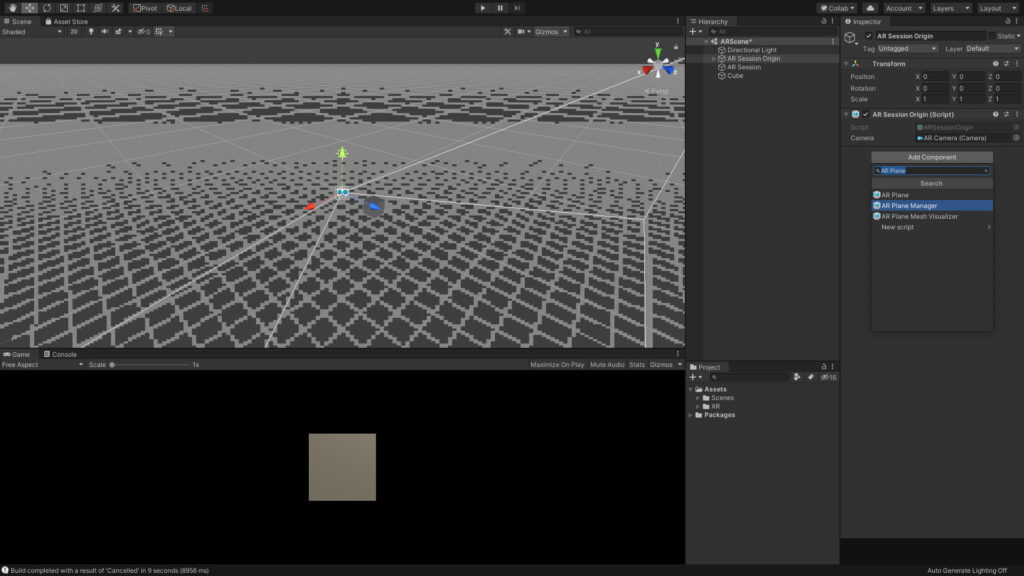
下の画像のようになっていれば、OKです!

「Plane Prefab」が、None(Game Object)になっていると思います。
このままの場合、平面の検出はしてくれますが、どこが平面として検出してくれているかわからない状態です。
今回は、平面を確認したいのでPlaneを追加したいと思います!
Planeを作成
Hierarchyで、右クリック>XR>AR Default Plane を選択します!
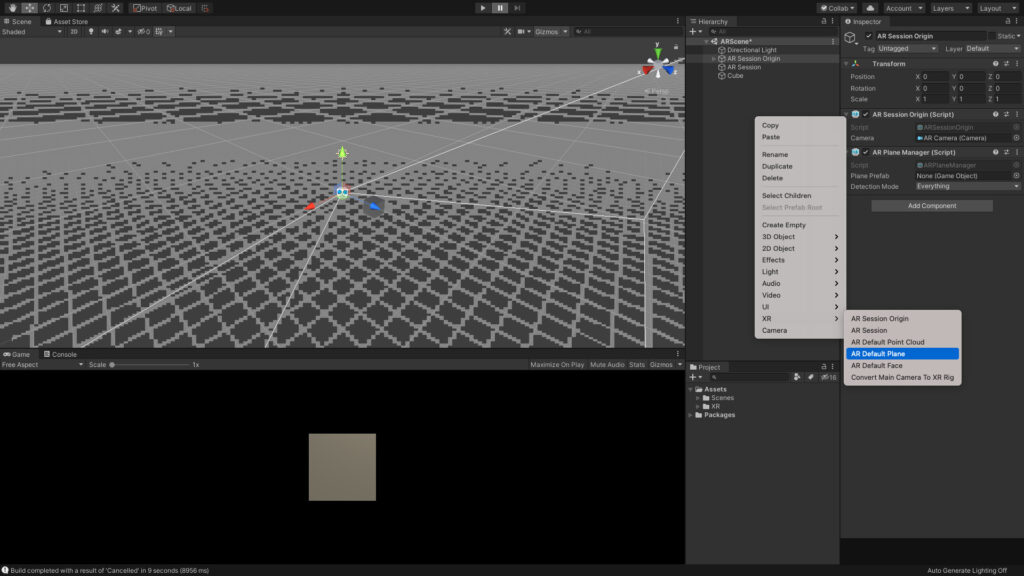
AR Default PlaneがHierarchyに配置されたと思います!
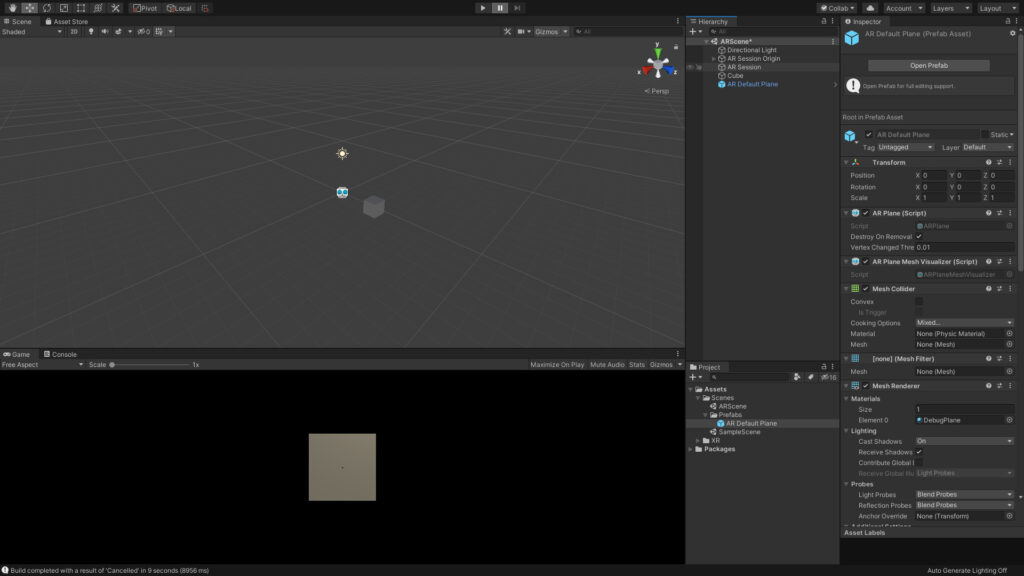
次に、Project>AssetsにPrefabsというフォルダを作成し、Prefabsフォルダに作成されたAR Default Planeをドラックします。
下の画像のように、AR Default Planeが青くなっていたらOKです!
次は、Hierarchyから「AR Default Plane」を一旦削除します。
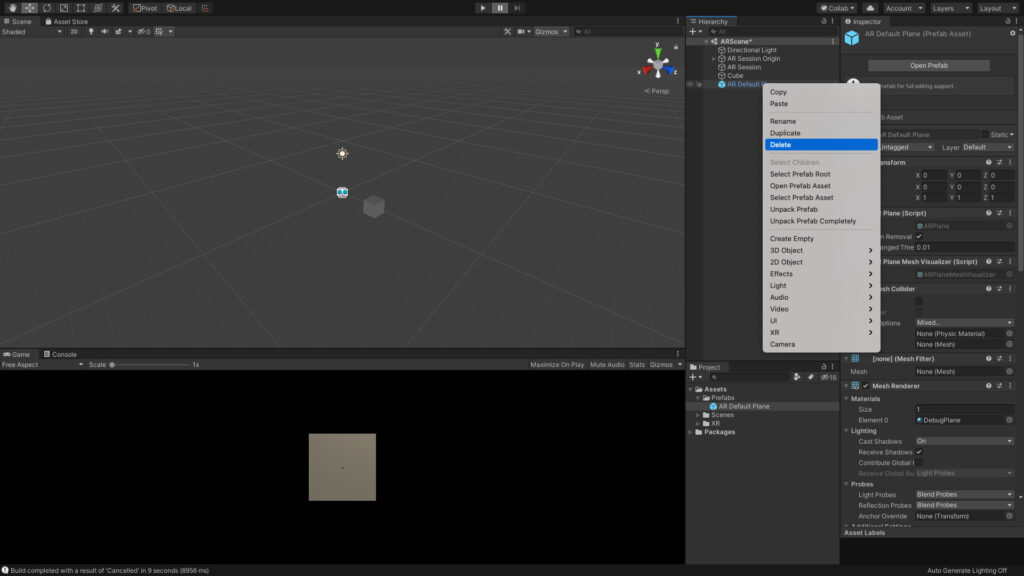
削除ができたら、先ほどPrefabsフォルダに入れた「AR Default Plane」を、AR Session Origin>AR Plane Manager>Plane Prefabにドラックします!
最終的に、上の写真のようになっていればOKです!
これで平面検出ができるようになりました!
平面に箱を配置する
今はまだ、平面を検出できるようにしただけで、ただ平面にAR Default Planeが表示されるだけです。
次は、平面に箱を配置するということをやっていきたいと思います!
少々、理解が難しいことも含まれますが、とりあえずこうすればいいんだ!!って思っていただけるといいと思います。
AR Raycast Managerの配置
Raycastとは、光線だと認識してもらえればいいと思います!
光線と先ほどのAR Default Planeがぶつかる場所に箱を配置します。
詳しく知りたい方は、Unity公式ページのリンクを参照してみてください!!
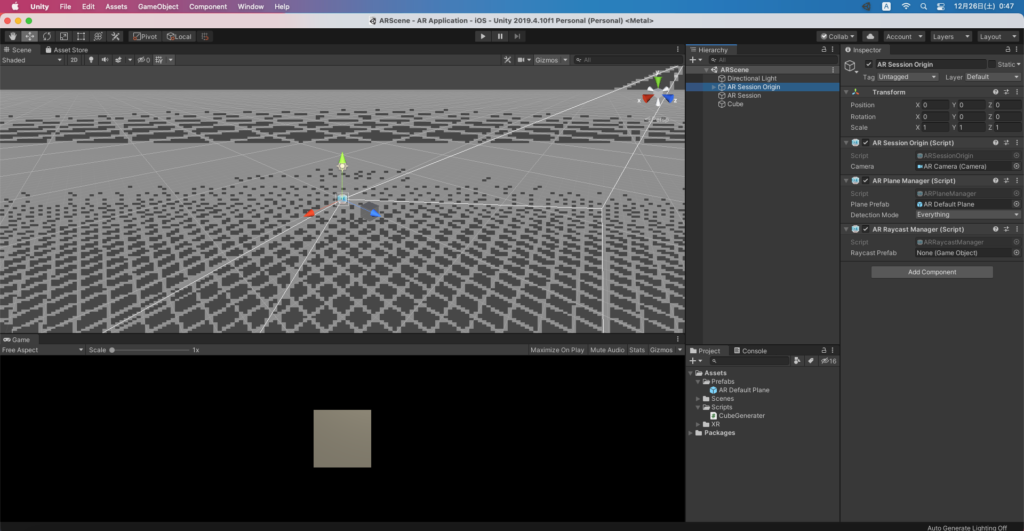
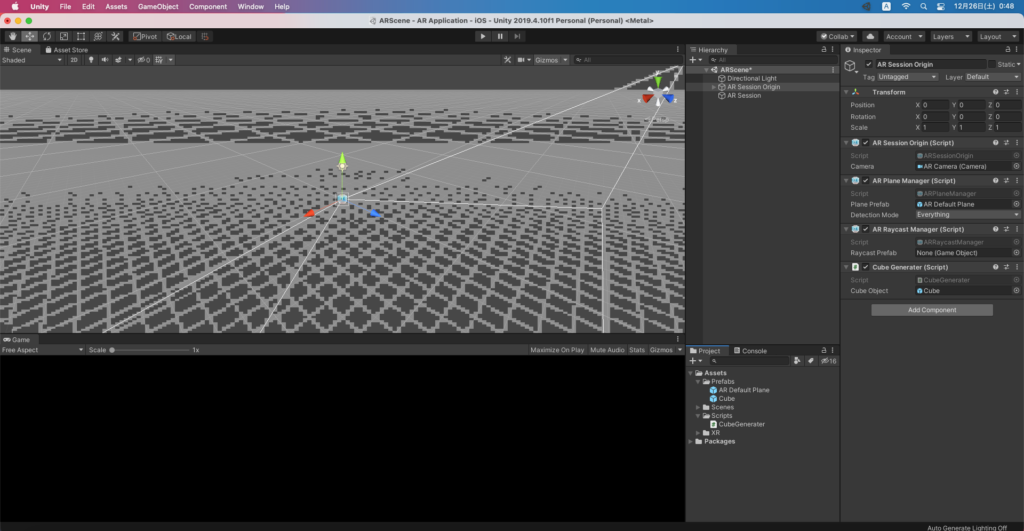
AR Session Origin > Add Component > AR Raycast Manager を追加します!

下の写真のようになっていればOKです!
タップ位置を取得する
次からは、少しコーディングをしていきます。
まずは、Project>AssetsにScriptsフォルダを作成してください。
Scriptsフォルダを作成したら、そこにCreate>C# Scriptを選択し、C#ファイルを作成してください!
C#の名前は、任意に変更してください!(今回は、CubeGeneraterとしてます!)
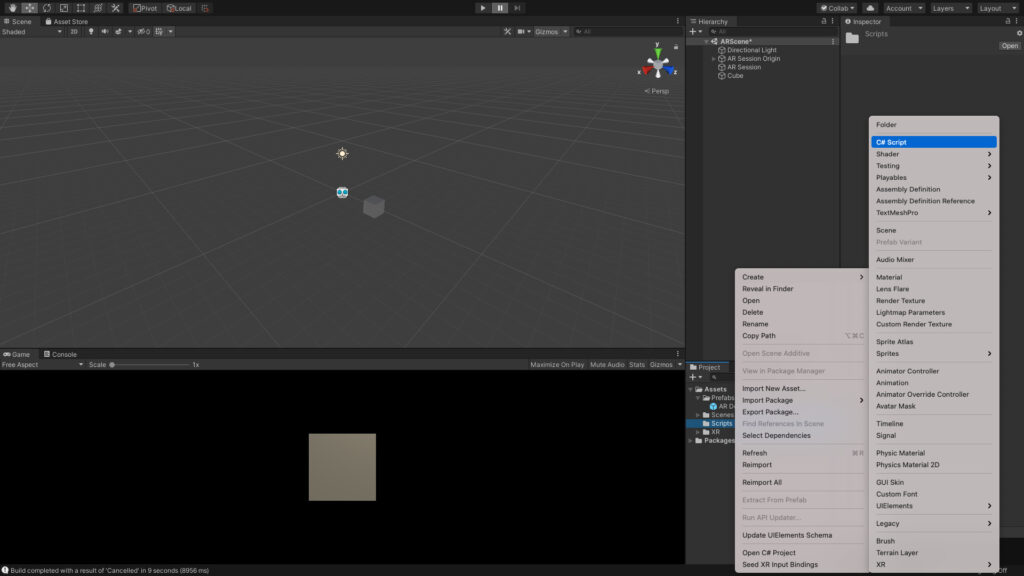
できたら、下の写真のようになっていると思います!
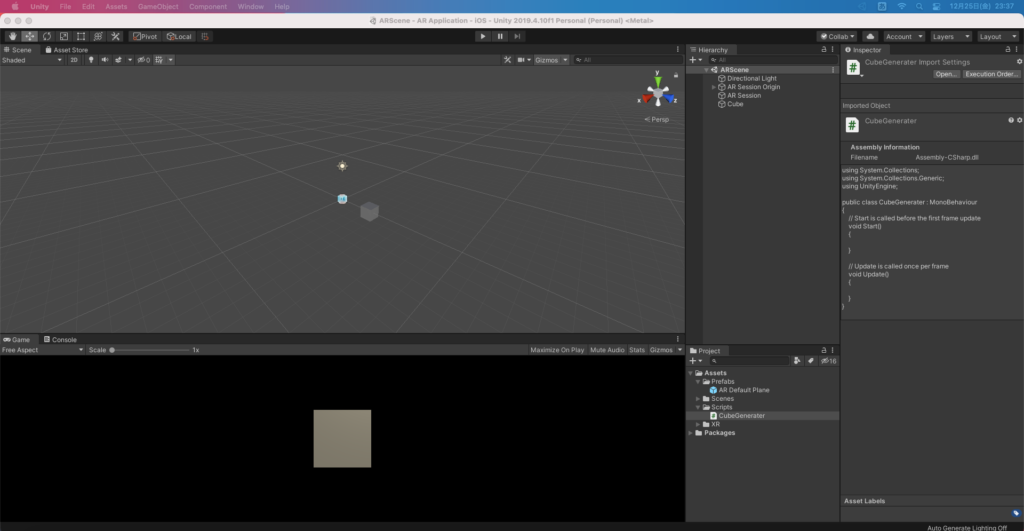
作成されたC#ファイルを下のように編集します。
using System.Collections;
using System.Collections.Generic;
using UnityEngine;
using UnityEngine.XR.ARFoundation;
using UnityEngine.XR.ARSubsystems;

public class CubeGenerater : MonoBehaviour
{
    // 平面に生成するオブジェクト
    [SerializeField] GameObject CubeObject;

    // ARRaycastManager
    ARRaycastManager raycastManager;

    // RaycastとPlaneが衝突した情報を格納
    List<ARRaycastHit> hits = new List<ARRaycastHit>();


    // Start is called before the first frame update
    void Start()
    {
        // ARRaycastManager格納する
        raycastManager = GetComponent<ARRaycastManager>();
    }

    // Update is called once per frame
    void Update()
    {
        // 画面がタッチされたかチェック
        if(Input.touchCount > 0)
        {
            // タッチ情報を格納
            Touch touch = Input.GetTouch(0);

            // タッチした位置からRayを飛ばして、Planeにヒットした情報をhitsに格納する
            if(raycastManager.Raycast(touch.position, hits, TrackableType.Planes))
            {
                // Cubeを生成する
                Instantiate(CubeObject, hits[0].pose.position, Quaternion.identity);
            }
        }
    }
}
Visual Studioが標準で起動されると思います。Visual Studioで問題なければ、そのまま使ってもらえれば問題ないと思います。
もし、Visual Studio Codeを使用したい場合は、こちらを参考にしてください!

C#ファイルの編集が完了したら、一旦保存してUnityに戻ってください!
次に、AR Session Originに先ほど保存したC#ファイルをドラックしてください!
下の写真のようになればOKです!

このままでは、作成したスクリプトのCube ObjectがNone(Game Object)のままなので、Cubeを選択してあげる必要があります。
まず、CubeをAssets>Prefabsにドラックしてください!
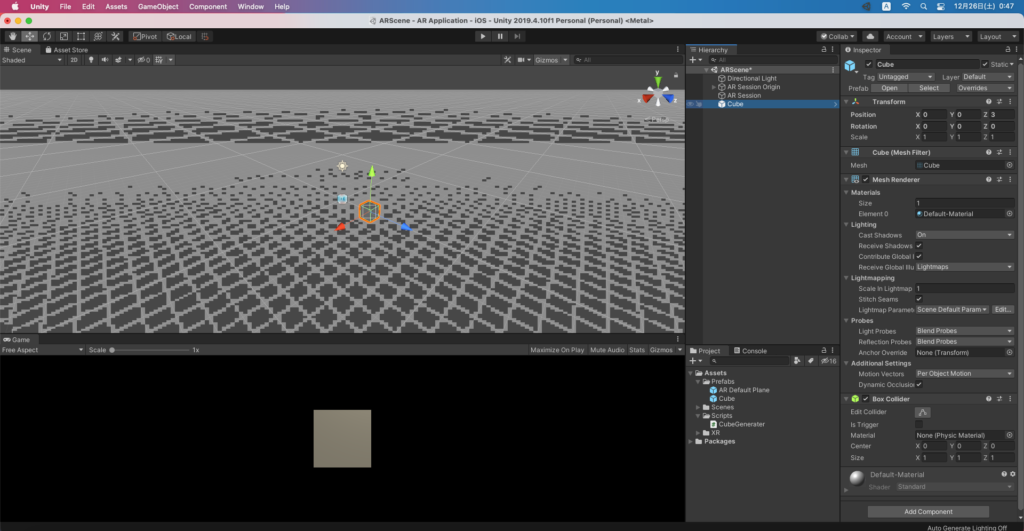
Cubeも青くなったと思います。
青くなったらHierarchyから一旦、Cubeを削除します。
削除ができたら、Prefabsに入っているCubeをAR Session Origin>Cube Controller(名前は任意)>Cube Objectにドラックします!
これで完成です!!
ビルドして、実機で確認してみましょう!
実際に確認してみる!!
まずは、ビルドしましょう!!
Build Settings>Buildを選択し、生成された「Unity-iPhone.xcodeprojをXcodeで実行する流れです。わからなければ、前回を参考にしてみてください!

黄色の板みたいなものが、AR Default Planeと言っていたものです。
地面の一部を平面と認識してくれています。平面に向かってタップをすることで下の画像のように箱が配置されるはずです!

まとめ
今回は、ARで平面を検出し、検出した平面に箱を配置しました。
いくつか聞き慣れない単語は、出てきましたが作業的には簡単だったのではないでしょうか。
学習に使った本はこちら!
クマじいAmazon Kindle Unlimited でもUnityの本はいっぱいあるんじゃ!!
次回は、箱ではないものを表示してみようと思います!!