

今回は、FlutterアプリにFirebaseの導入をやっていこうと思います!
Firebaseは、Baasなので認証機能やDBなど様々なバックエンド機能を簡単に利用することができます!
もし、まだFlutterの開発環境構築がまだの方は、「FlutterとDartの開発環境構築をしよう!」を参考にしてみてください!

 クマじい
クマじいわしはFirebaseなんて初めて聞いたぞ!
学習に使った本はこちら!
クマじいAmazon Kindle Unlimited でもFlutter、Dartの本はいっぱいあるぞ!
Firebaseの設定をする!

まずは、Firebaseのプロジェクトの作成をしよう!
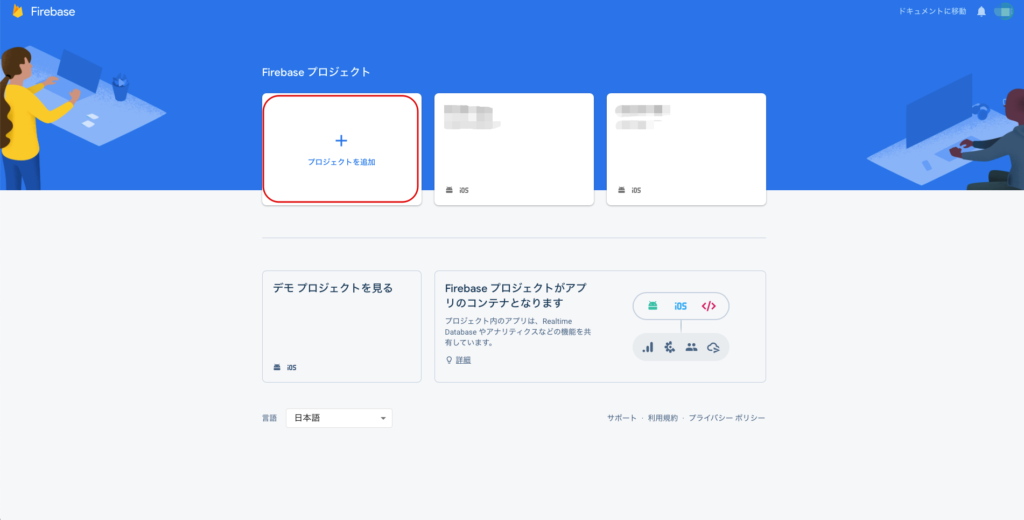
Firebaseのプロジェクトを作成
- Firebaseのアカウントを開設する。
- プロジェクトを追加を押下
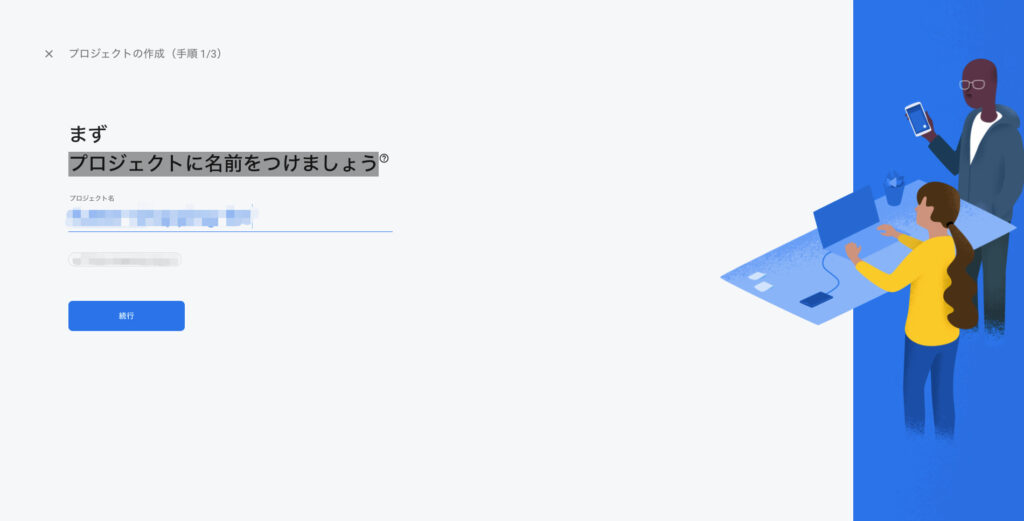
- プロジェクト名を入力して、続行ボタンを押下
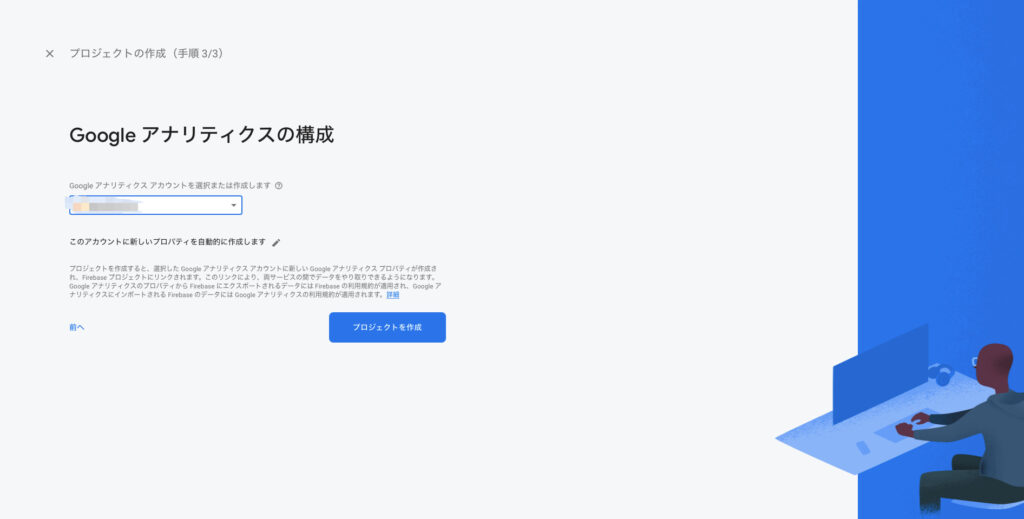
- Googleアナリテクスアカウントを選択して、プロジェクト作成ボタンを押下
(別途アカウントを作成する必要があるかもしれません。) - プロジェクトの作成が終わったら、続行ボタンを押下

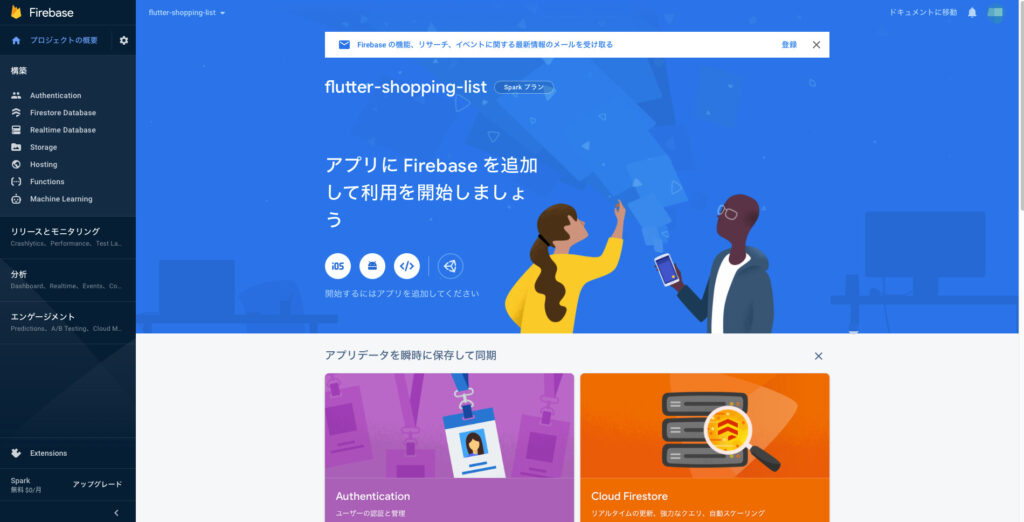
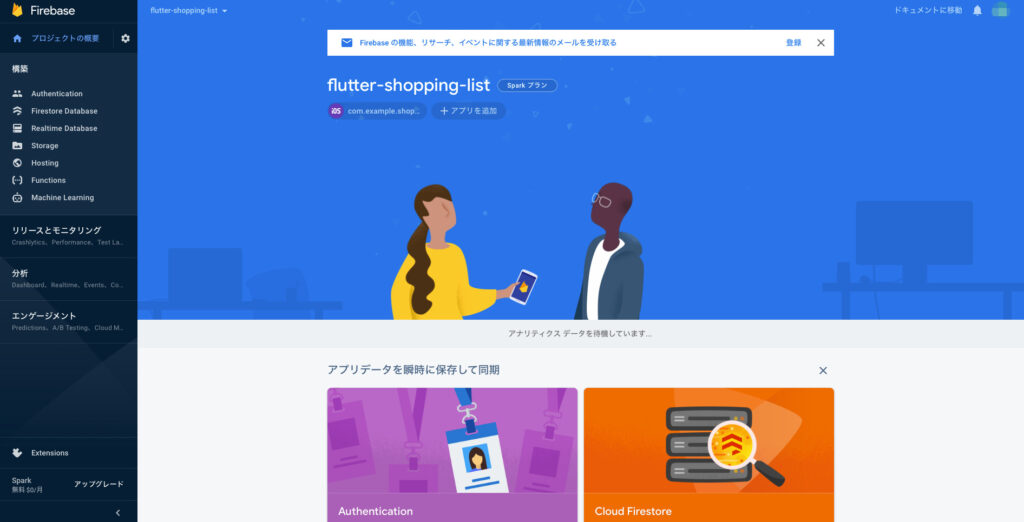
- こんな画面が表示されたらプロジェクト作成は完了です!
iOSの設定をする!

次は、iOSでFirebaseを使えるようにしていこう!
念のためですが、Firebaseの設定をしていく際に出てくる画面は、Swift用なので参考にしてはいけません。
(エラーが出てしまいます。)
Flutterの場合は、必ずこちらの手順を参考するようにしてください!
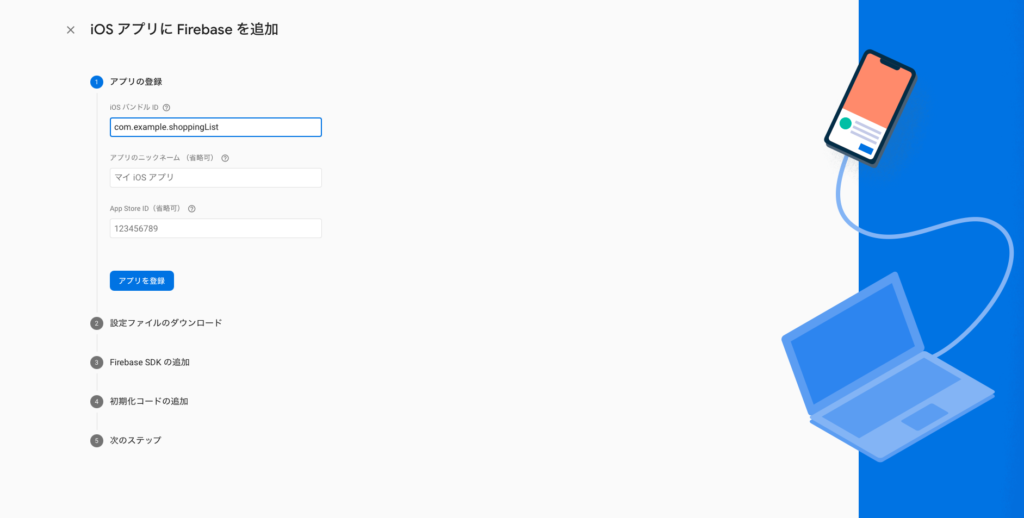
アプリの登録
- 追加するアプリのアイコンを選択(今回は、iOSのアイコンを選択してください。)
- iOSバンドルIDを入力
- 【参考】iOSバンドルIDは、XcodeでRunnerを開くと確認することができます。
(基本的にはアプリ名になっているはずです。)

- 「GoogleService-info.plistをダウンロード」を押下
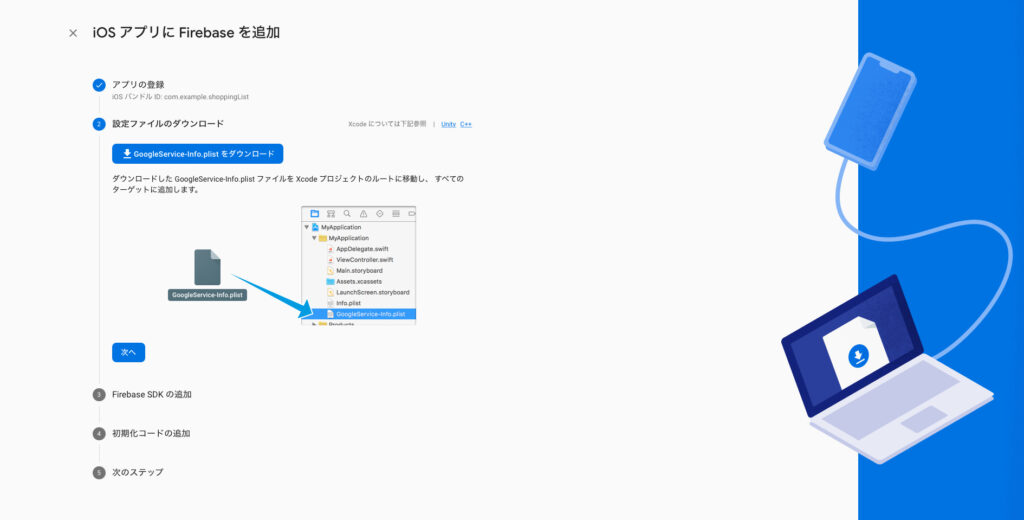
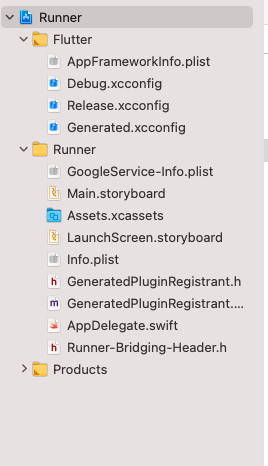
- ダウンロードしたファイルをXcodeで[Runner/Runner]配下に配置する
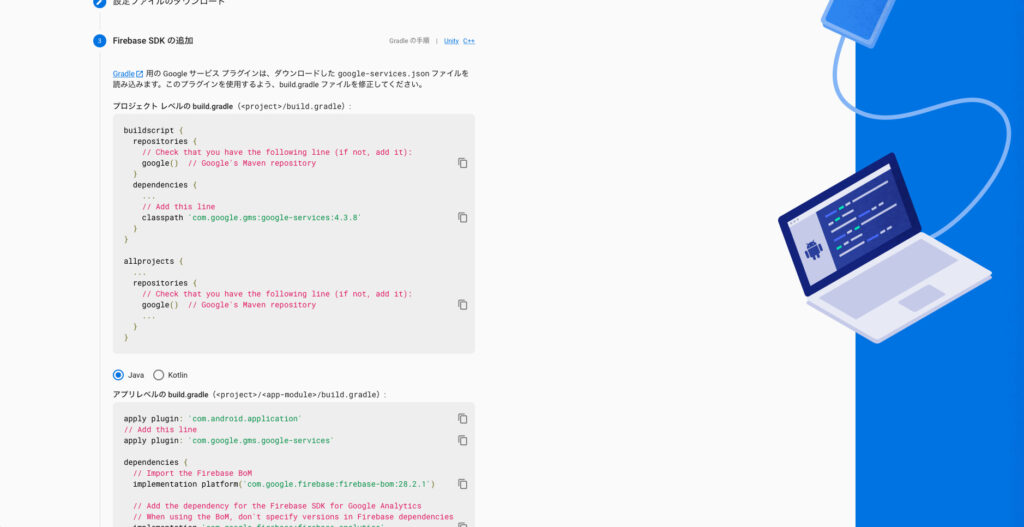
- 続いて設定画面では、Firebase SDKの追加をやっていくようになっていますが、これをやるとFlutterではビルド時にエラーになってしまうので、そのまま「次へ」ボタンを押しましょう!
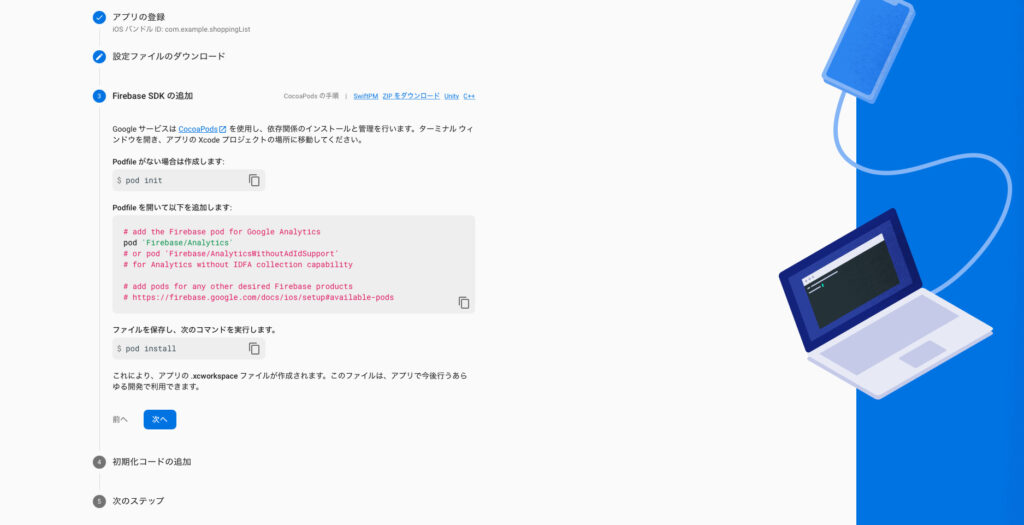
- 初期化コードの追加もFlutterでは不要ですので、「次へ」ボタンを押して問題ありません。
![x
iOS
771) E Firebase
iOS ID: com.example.shoppingList
Firebase SDK
Firebase
@ swift O Objective-C
import UIKit
import Firebase
class AppDe1egate: UIResponder,
var window: UIWind0W?
x -f AppDe1egate 5
UIApp1icationDe1egate {
func application(_ application: UIApp1ication,
didFIrushLaunchingWIthOptions launchoptlons :
[UIApp1icationLaunchOpt10nsKey: Any]? )
Bool {
FirebaseApp . configure( )](https://teech-lab.com/wp-content/uploads/2021/07/image-5-1-1024x527.jpg)
- ここまでできれば、アプリの登録は完了です!
FlutterFireプラグインを追加
ここからはFlutterのみに必要な手順だよ!
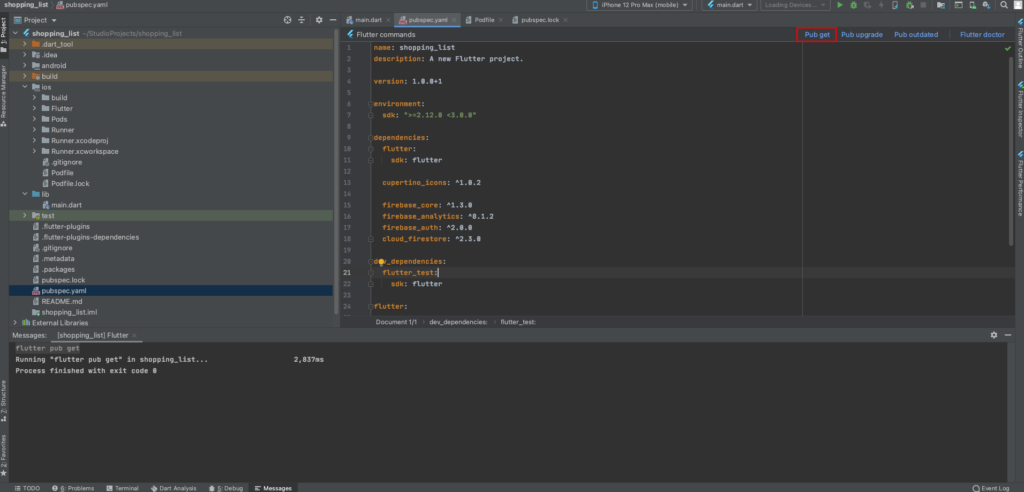
- pubspec.yamlにFlutterFireプラグインを追加
(最新を検索して導入してください。今回使うものは下記ですが他にもプラグインは色々あります。) - 【参考】firebase_core(必須):https://pub.dev/packages/firebase_core
- 【参考】firebase_analytics(アナリテクスが必要な人):https://pub.dev/packages/firebase_analytics
- 【参考】firebase_auth(認証機能を使う人):https://pub.dev/packages/firebase_auth
- 【参考】cloud_firestore(FireStoreを使う人):https://pub.dev/packages/cloud_firestore
description: A new Flutter project.

version: 1.0.0+1

environment:
  sdk: ">=2.12.0 <3.0.0"

dependencies:
  flutter:
    sdk: flutter

  cupertino_icons: ^1.0.2

  firebase_core: ^1.3.0
  firebase_analytics: ^8.1.2
  firebase_auth: ^2.0.0
  cloud_firestore: ^2.3.0

dev_dependencies:
  flutter_test:
    sdk: flutter

flutter:

uses-material-design: true- pubspec.yamlの設定が終わったら、Pub getを実行しましょう!(コマンドでも構いません。)
これでiOSの設定は完了です!
 クマじい
クマじい意外と大変じゃの〜
Androidの設定をする!
最後に、AndroidでFirebaseを使えるようにしていこう!
アプリを登録
- Androidパッケージ名を入力して、「アプリを登録」ボタンを押下
- 【参考】Androidパッケージ名は、android/app/build.gradle のapplicationIdを入力してください。
![Android ア プ リ に Firebase を 追 加
X
0 ア プ リ の 登 録
Android バ ッ ケ ー ジ 名 〇
com.example-shopping」 ist
ア プ リ の ニ ッ ク ネ ー ム ( 省 路 可 ) 〇
マ イ And 「 oid ア プ リ
デ バ ッ グ 用 の 署 名 証 明 書 SHA ・ 1 ( 省 略 可 ) ②
00 ℃ 0 ℃ 0 : 00 : 00 : 00 : 00 ℃ 0 ℃ 0 ℃ 0 : 00 : 00 : 00 : 00 : 00 : 00 : 00 」
Auth で Dynamic し nks 、 Goog に ロ グ イ ン 、 電 話 番 号 を サ ホ ー ト す る た め に 必 須 で す 。
定 ] で SHA ・ 1 を 集 し て く だ さ い 。
ア プ リ を 登 録
0 設 定 フ ァ イ ル の ダ ウ ン ロ
ー ド](https://teech-lab.com/wp-content/uploads/2021/07/image-7-1024x519.jpg)
![shopping _ list
Project
: v 4 shopping_list
—/StudioProjects/shopping_list
> 'Ill .dart_tool
v android
shopping_tist...
iPhone 12 Pro (mob"e)
Podfile
pubspec. lock
main.dart
pub spec.yamd
4 Flutter commands
a
>
build.gradle
gradle
ib .gitignore
build.gradle
"I gradle.properties
gradlew
gradlew.bat
local.properties
settings.gradle
shopping_list_android.iml
> • build
19
20
21
22
23
24
25
26
27
28
29
31
32
33
34
35
36
37
38
39
41
42
= tocatProperties.getProperty(' flutter.
def flutterVersionName
(OuttecVecsionName
null) {
flutterVersionName '1.8
apply plugin: 'com.android . application'
apply plugin: ' '
• "$ftutterRoot/packages/ftutter_toots/gradte/fIutter. gradte"
apply from.
•android {
compileSdkVersion 38
sourceSets {
main. java.srcDirs +2 'src/main/kottin'
defaultConfig {
// TODO: Specify your own unique Application ID (htt
applicationld "com.example.shopping_tist"
minSdkVersion 16
targetSdkVersion 38
versionCode flutterVersionCode.toInteger()
versionName flutterVersionName
4 main-dart
om
>
>
>
>
>
>
Messages:
flutter
Running
build
Flutter
Pods
Runner
Runner.xcodeproj
Runner.xcworkspace
•gitignore
Podfile
Podfile.lock
[shopping_list] Flutter
pub get
"flutter pub get" in
t
i'
android0
defaultConfigO
2, 837ms](https://teech-lab.com/wp-content/uploads/2021/07/image-7-1024x494.png)
- 「google-service.jsonをダウンロード」ボタンを押下して、設定ファイルをウンロードする。
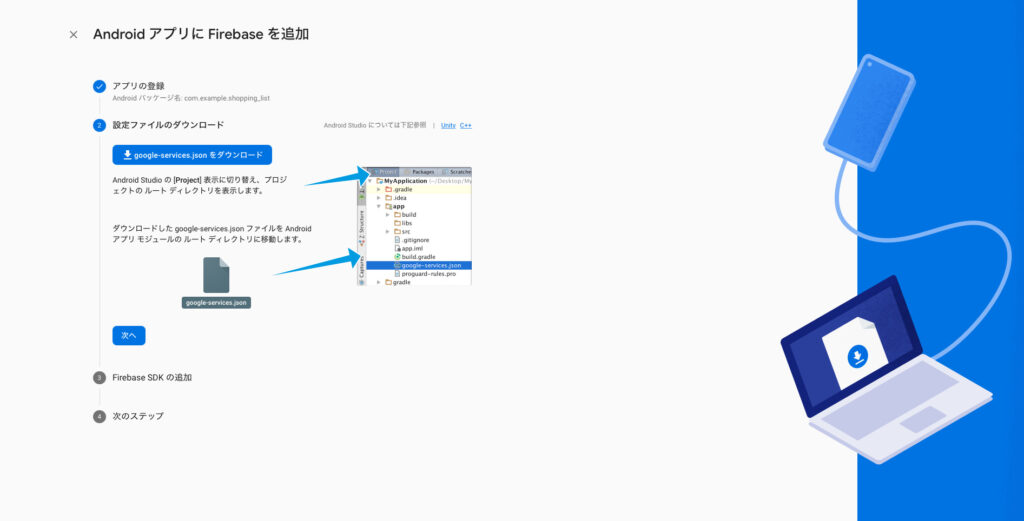
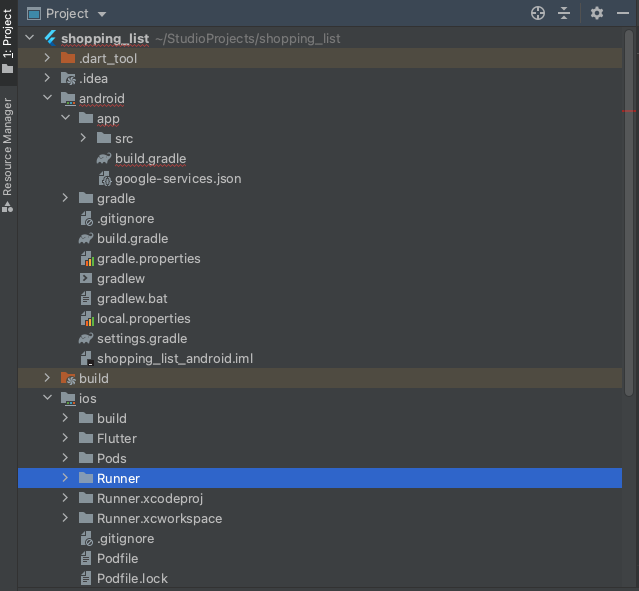
- 設定ファイルを[android/app]配下に配置する
- [android/build.gradle]にFirebase SDKを追加
buildscript {
    ext.kotlin_version = '1.3.50'
    repositories {
        google()
        jcenter()
    }

    dependencies {
        classpath 'com.android.tools.build:gradle:4.1.0'
        classpath "org.jetbrains.kotlin:kotlin-gradle-plugin:$kotlin_version"

        classpath 'com.google.gms:google-services:4.3.8'
    }
}

allprojects {
    repositories {
        google()
        jcenter()
    }
}

rootProject.buildDir = '../build'
subprojects {
    project.buildDir = "${rootProject.buildDir}/${project.name}"
    project.evaluationDependsOn(':app')
}

task clean(type: Delete) {
    delete rootProject.buildDir
}- [android/app/build.gradle]にFirebase SDKを追加
- 【注意】アプリレベルのbuild.gradleはFlutterは別設定になっているので、注意してください。
def localProperties = new Properties()
def localPropertiesFile = rootProject.file('local.properties')
if (localPropertiesFile.exists()) {
    localPropertiesFile.withReader('UTF-8') { reader ->
        localProperties.load(reader)
    }
}

def flutterRoot = localProperties.getProperty('flutter.sdk')
if (flutterRoot == null) {
    throw new GradleException("Flutter SDK not found. Define location with flutter.sdk in the local.properties file.")
}

def flutterVersionCode = localProperties.getProperty('flutter.versionCode')
if (flutterVersionCode == null) {
    flutterVersionCode = '1'
}

def flutterVersionName = localProperties.getProperty('flutter.versionName')
if (flutterVersionName == null) {
    flutterVersionName = '1.0'
}

apply plugin: 'com.android.application'
apply plugin: 'kotlin-android'
apply from: "$flutterRoot/packages/flutter_tools/gradle/flutter.gradle"

apply plugin: 'com.google.gms.google-services'

android {
    compileSdkVersion 30

    sourceSets {
        main.java.srcDirs += 'src/main/kotlin'
    }

    defaultConfig {
        // TODO: Specify your own unique Application ID (https://developer.android.com/studio/build/application-id.html).
        applicationId "com.example.shopping_list"
        minSdkVersion 16
        targetSdkVersion 30
        versionCode flutterVersionCode.toInteger()
        versionName flutterVersionName
    }

    buildTypes {
        release {
            // TODO: Add your own signing config for the release build.
            // Signing with the debug keys for now, so `flutter run --release` works.
            signingConfig signingConfigs.debug
        }
    }
}

flutter {
    source '../..'
}

dependencies {
    implementation "org.jetbrains.kotlin:kotlin-stdlib-jdk7:$kotlin_version"
}- 最後にpubspec.yamlに移動して、Pub getを実行(コマンドでも構いません。)

これでAndroidの設定も完了です!
 クマじい
クマじいAndroidは簡単じゃったの。
最後に!
今回は、FlutterでFirebaseを使うための設定をやっていきました。
本当はFirebaseを使うところも載せたかったのですが、長くなったので一旦ここまでとします。
次回は、実際に「Firebaseを使った匿名認証」をやっていますので興味がある方はぜひ参考にしてみてください。
また、今回Flutterを勉強するにあたり利用した教材をあげています。
主に本とUdemyの動画教材を利用しています。興味ある方は、本やUdemyを購入して勉強してみることをおすすめします。
学習に使った本はこちら!
クマじいAmazon Kindle Unlimited でもFlutter、Dartの本はいっぱいあるぞ!